DropBox is an efficient and fast way to share files online but it is constrained by certain security issues which was recently brought to surface by few privacy and security stumbles. Moreover, there was an authentication bug that hit the DropBox recently and allowed anyone to log-in to your account with any password for a period of four hours. There are other reasons that makes you decisive about encrypting data on DropBox including the ever changing Terms and Conditions. One recent change in Dropbox T&C came back in April and stated that DropBox could anytime decrypt user data and send information to Government. With so much going on, one can’t over emphasize the need to encrypt data on DropBox and while there are plenty of ways to do so, here in this post we will only be dealing with the most famous, simple and trusted procedure to encrypt Dropbox data.
In this post we have collected information on How to encrypt data using DropBox truecrypt encryption.
Step 1: Download and and Install TrueCrypt . The software is free to use and it advisable to use extract mode for installation as this will not only install the software itself, but also provide you with a portable folder that can be installed on other computers using USB device or the DropBox itself
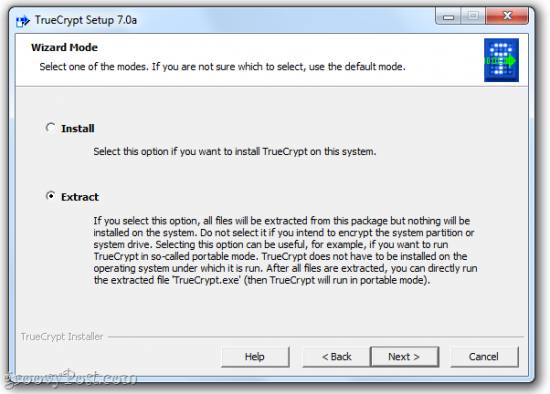
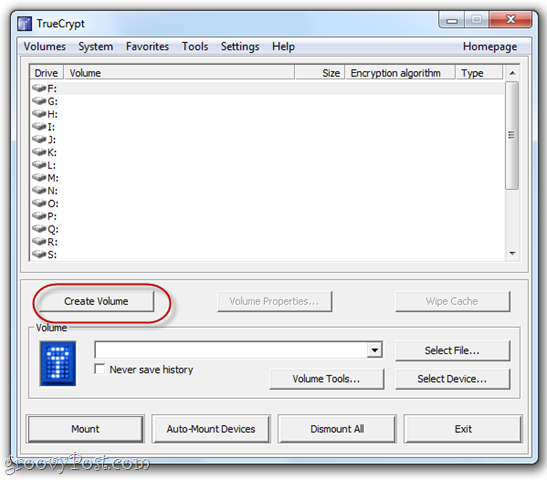
Step 2: Next, you need to Run Truecrypt.exe and click on create volume button located near the left lower corner of the Truecrypt Window.
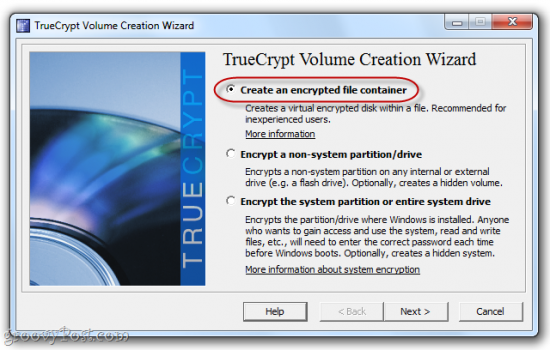
Step 3: You will now be presented with three options and here you just need to choose the very first option which is “Create an encrypted file container” . Other options are more advanced and you need not to consider them for the moment.
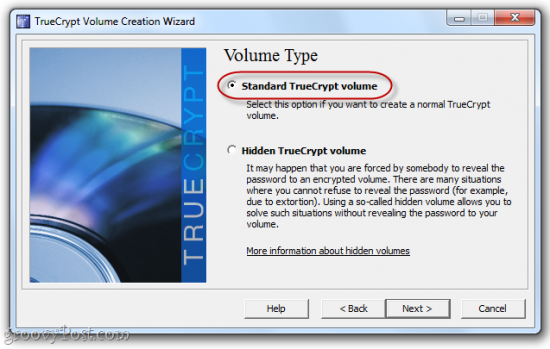
Step 4: Now, Select “Standard TrueCrypt volume” and click next.
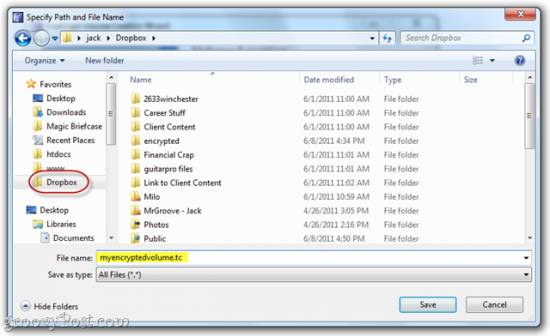
Step 5: In this window you will be prompted to create a Volume by clicking on Select files tab.You can browse to your DropBox folder and create any file name of any extension for your Volume.
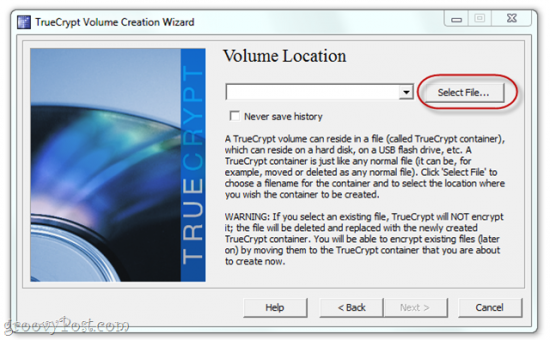
In this step it should be noted that while you can choose any extension you want to be more clever and effectively disguise your files, it is still advised to omit extensions or use conventional .tc extension as anything other than that will alarm your Virus scanner.
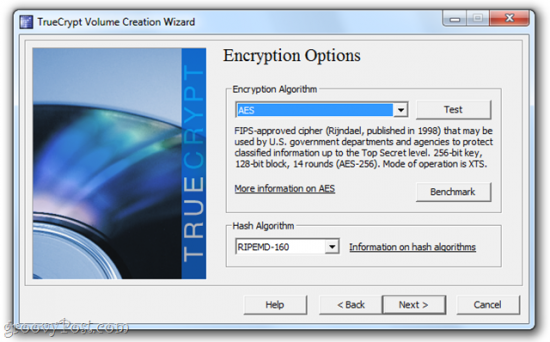
Step 6 : You can now select various encryption options to complicate things around for other people or you can try the default option which will more than suffice the purpose.
Step 7: In the next window you can select the amount of memory on your DropBox you want to dedicate to encryption and depending on your personal need you can select anything ranging from 1 MB to complete 2GB encryption.
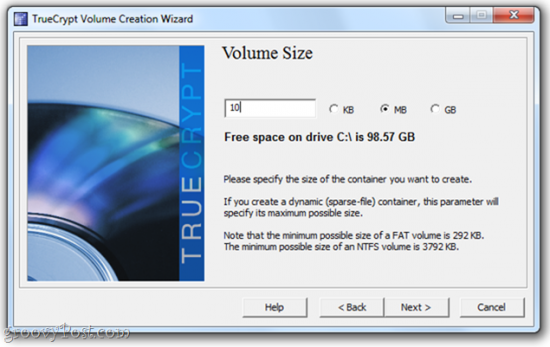
Another thing to try here is to create a Dyanamic Volume which in essence means a Volume that will expand depending on the amount of data you put into it. Like for example if you have a 2 GB file container but it only has 5 MB of data in it, it’ll only take up 5 MB of Dropbox space but this process will rob you of some peed.
Step 8: Next, you will have to create a password for encryption and make sure it is very strong as anything weak will waste the whole purpose of DropBox Truecrypt encryption.
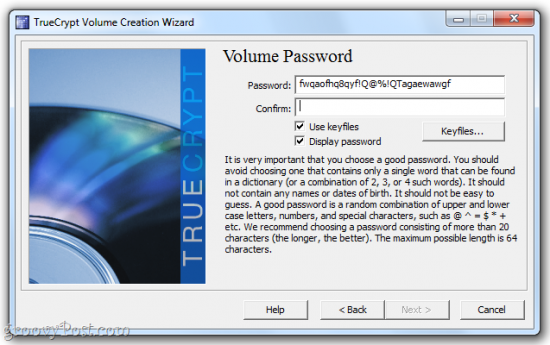
A more secure and smart way to try here is The Keyfile option which enables you to create a certain file which acts just like the way a real Key works. It means no one can access your files without possessing this Key File and you can either save this to your Hardrive or alternatively use an USB drive to carry this ‘Key’ around.
Step 9: On the next screen you will be prompted to move your mouse around, this is to increase the Cryptographic strength of your encryption Keys. After you are satisfied, click on format button to finish the process of TrueCrypt volume creation.
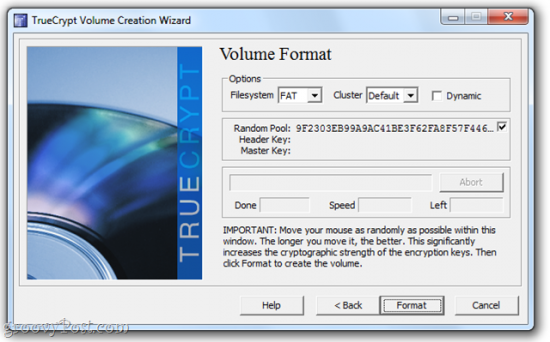
So far you have only created a Truecrypt Standalone file. You can drag it and drop it, copy it and paste it or move it to anywhere you’d like. To read and write to the volume, you just have to mount it using TrueCrypt and this part of the process will be dealt with in the rest part of this post.
Step 10: Launch TrueCrpyt and Click on Select File
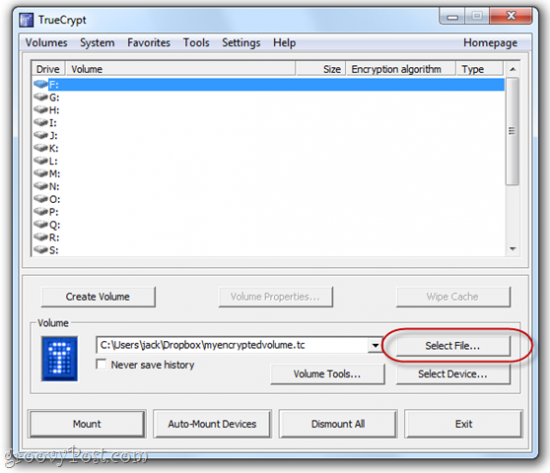
Step 11: Navigate to the Volume you created earlier in this post and open it.
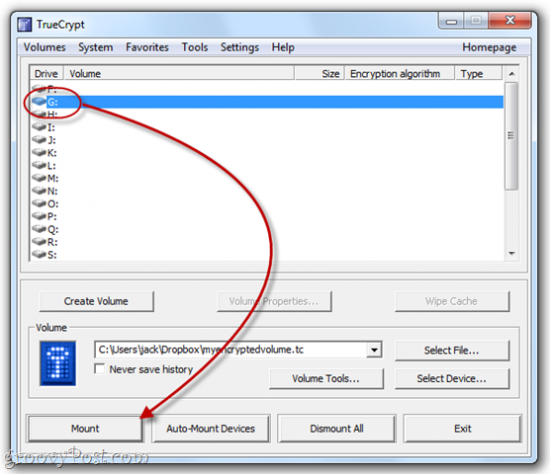
Step 12: Now select any drive letter from the many listed in this window and click on Mount.
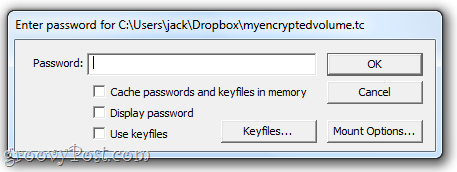
Step 13: Enter your password and, if you chose a keyfile, browse for it by checking Use keyfiles andClicking Keyfiles.
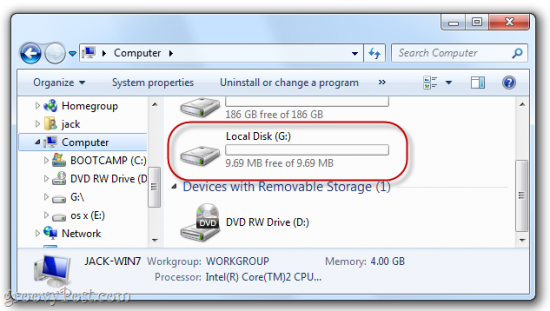
Step 14: This volume is now created, mounted on your Computer and can be browsed easily under Computer in Windows Explorer.
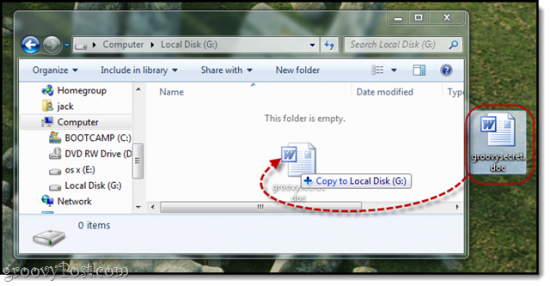
Step 15: Save and move files to this drive like you do it in on an USB drive and the files will be secure and ready to be accessed next time you mount the Volume.
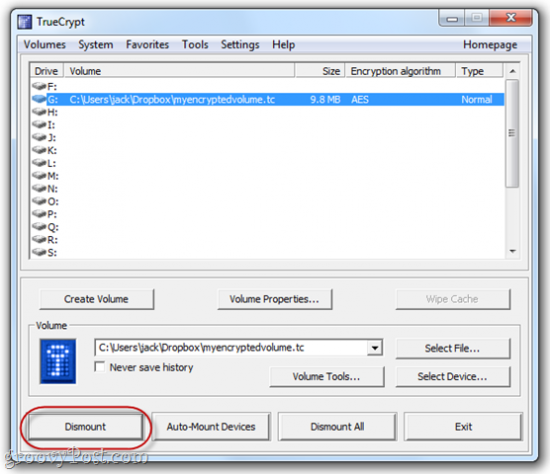
Step 16: The last step is easy but important, here you will need to launch the TrueCypt again, select the Volume and dismount in order to sync your Volume with DropBox.
Leave a Reply